I’ve lived in homes with some of the worst (aka) tiny kitchens out there. I’ve always been able to make them work, but let me tell you, having a custom kitchen designed for you is the BOMB!
For the kitchen to be functional for both my husband and I we each need separate workstations. We’ve found that having hers and his cutting boards, frying pans, knives, pantry shelves and even drawers to be the answer to continual wedded bliss.
This week in the One Room Challenge™ I’ll be sharing some layout options we considered and showing you some progress! Check out the previous post here.
I always like to do five or six design iterations before paring them back and choosing the best two concepts to present to the client. This 14′ x 15′ room (at the largest part of the bay window) presents several layout challenges with its three doorways, one built-in pantry, one fireplace and three low to the floor windows.
Even when inside I like feeling a connection to nature. I designed several layouts with the counters in front of the low windows (25″ from the floor). I know most people would take out the 100 + year old windows and upgrade them to energy efficient with a low E coating, but I feel that the wavy glass and the wood in the original double hung windows to be essential to how this 100 year old home feels. As the counter height is 36″, each window has a 10″ “planter box” inset into the counter/cabinet area to ensure that the counter and cabinets look like they belong in front of the window.
Here is a layout showing this style:
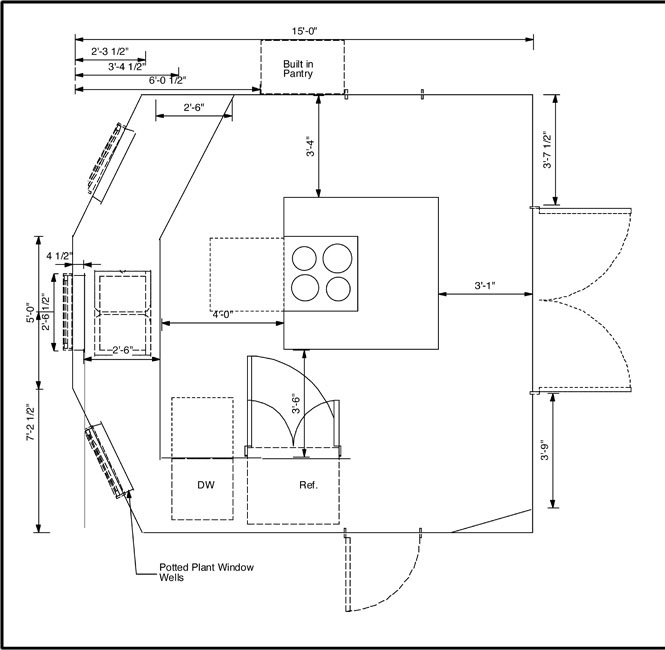
As pricing came back for this layout, it was more expensive than I originally thought. In this layout below I took out the counters and cabinets along the bay window wall and enlarged the island. Next I laid it out on the actual floor to see how it flowed in real life.
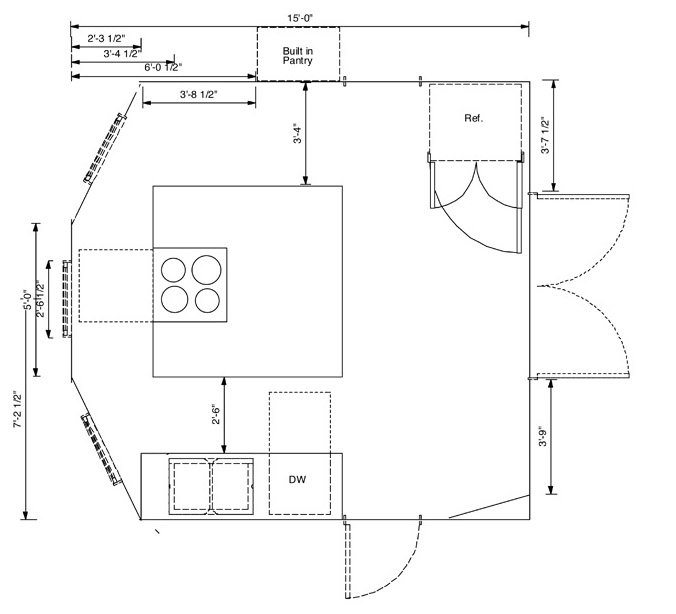
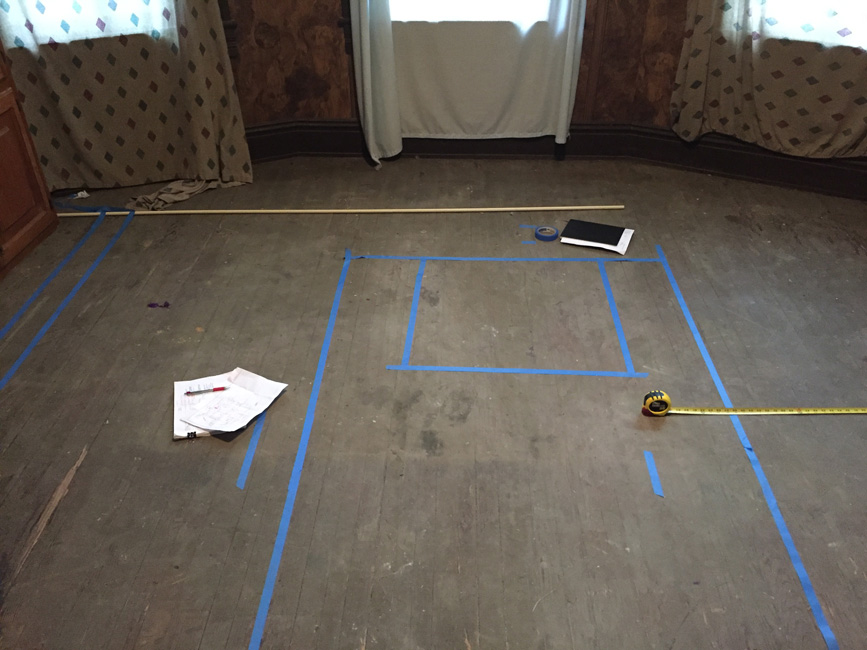
The tape lines on the far left of the image show the counter as a standard 24″ wide counter and as a 30″ counter. The short tape lines near the island layout show how the island could shift over.
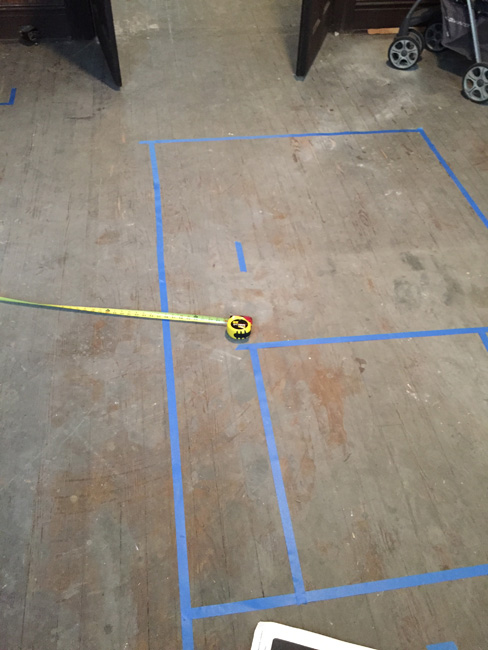
The two pictures above are opposite views of the layout. The island will definitely have to be shortened to allow flow from the living room to get by the fridge.
Next, I consulted with the cabinet makers to decide on the layout of the drawers and shelves before finalising the design.
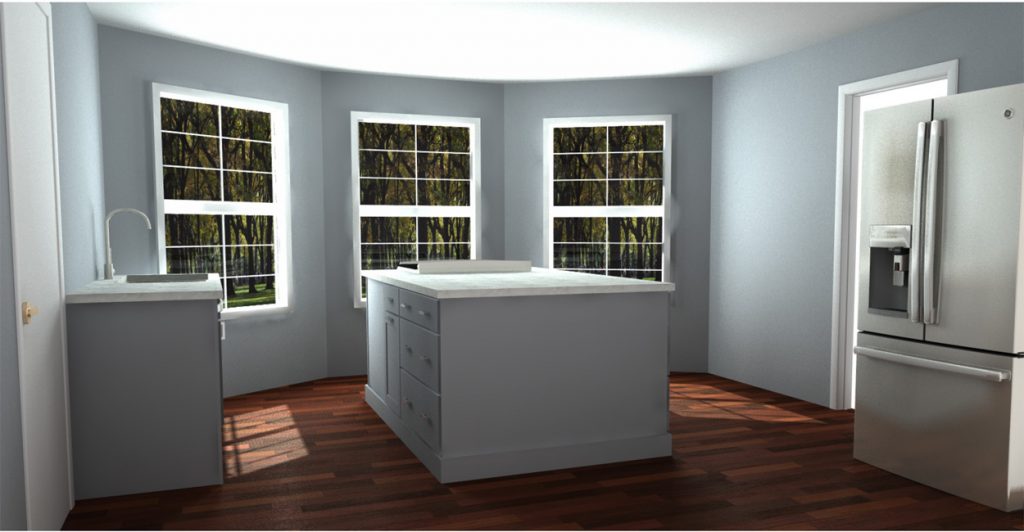
Here is a rendering of the layout while we are deciding on the final details.
Did I mention that we are living in our Reno????
No, I don’t think that’s come up yet. We set up a campstove for our “reno kitchen” in our two room living space, purchased a brand new fridge and had it delivered (twice, but that’s a story for another post) and we settled in, as much as you can in a roughing it situation!
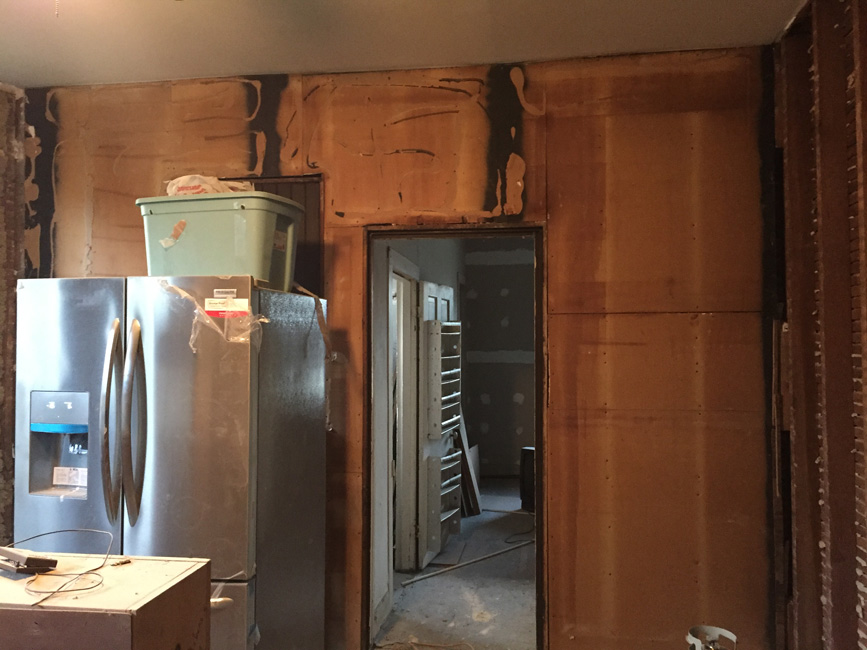
Work has started the wood paneling was removed along with the plaster and lath walls! Plaster dust is one of the finest dust that I’ve discovered so far in our renovation adventures.
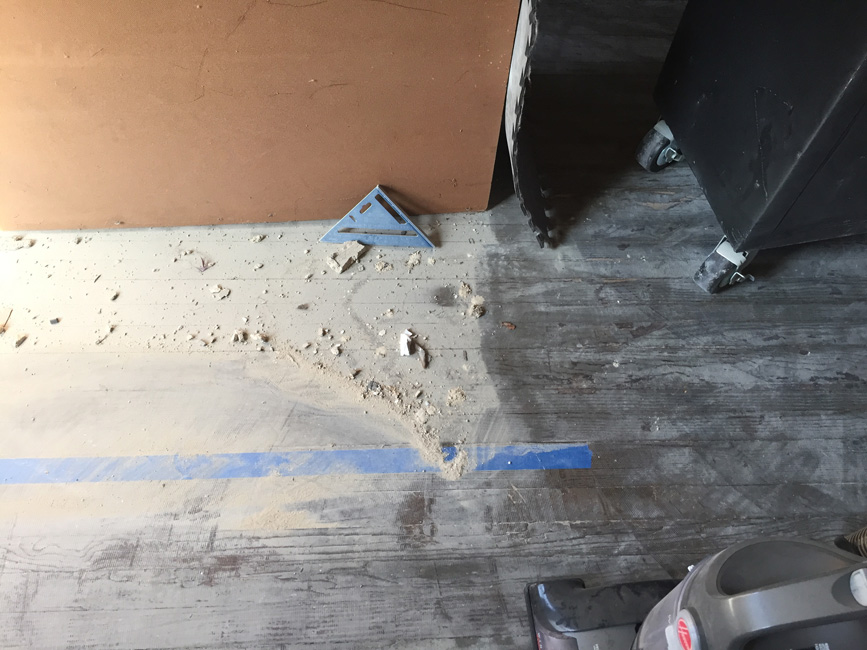
I used a shop vac to remove as much dust as I could, but then I ran my trusty hoover around the room too! Only use your home vacuum for renovation dust if you are prepared to replace it — the fine dust gets into the engine and will kill it. At this point in the renovation I am prepared to buy as many vacuums as needed!
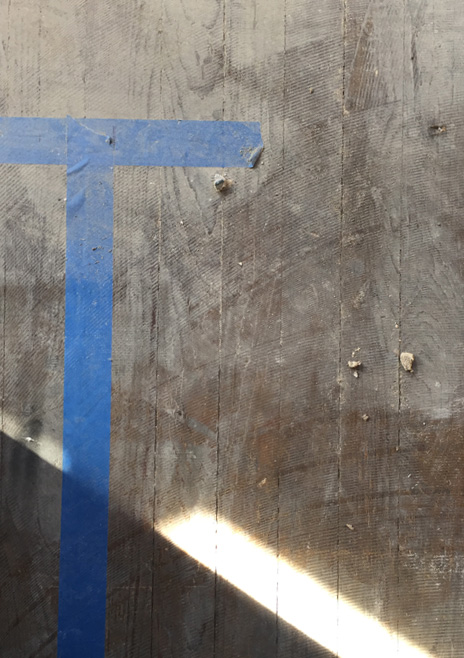
This is as clean as I am able to make this room. Plaster bits continue to fall.
The plaster dust seeps its way into our living quarters and everything is covered in a fine layer of dust. Woo hoo, welcome to renovation living!
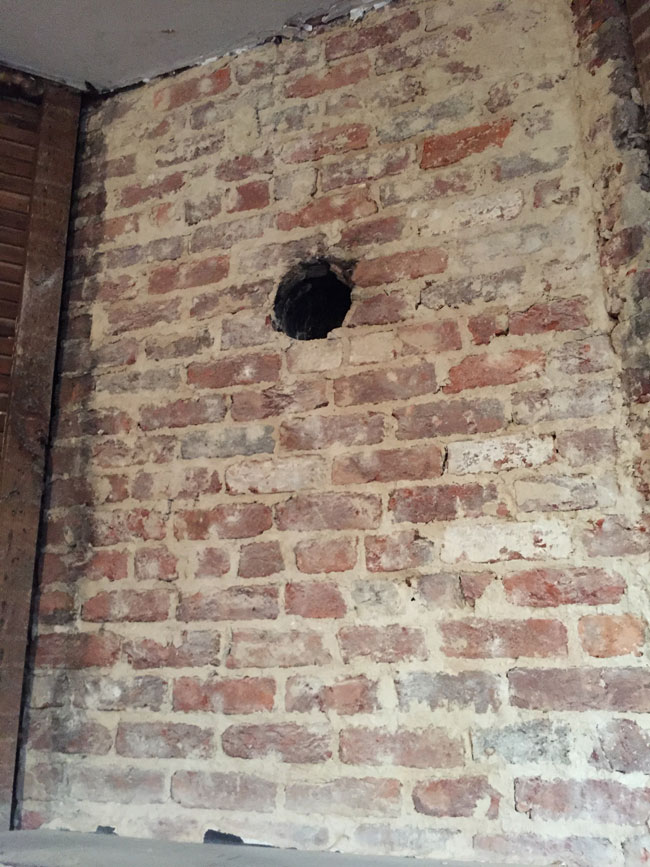
We did have a happy surprise though — there is beautiful brick above the mantle! I should say, that it will be beautiful once it’s cleaned up!
Here is a panoramic shot of the kitchen. I am standing between the french doors and the fireplace.

Yes, that is knob and tube wiring you see! We opted for a full rewire of the entire house!
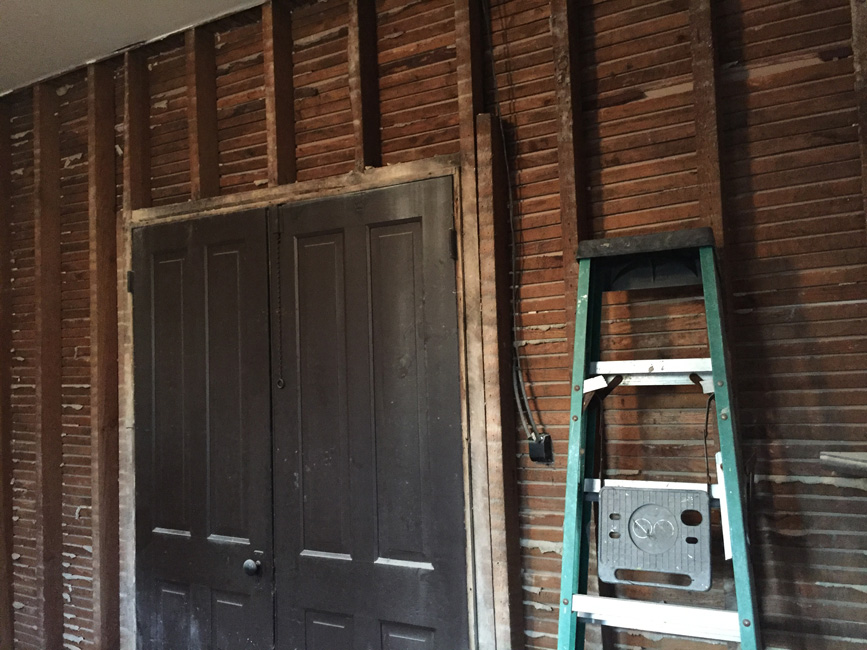
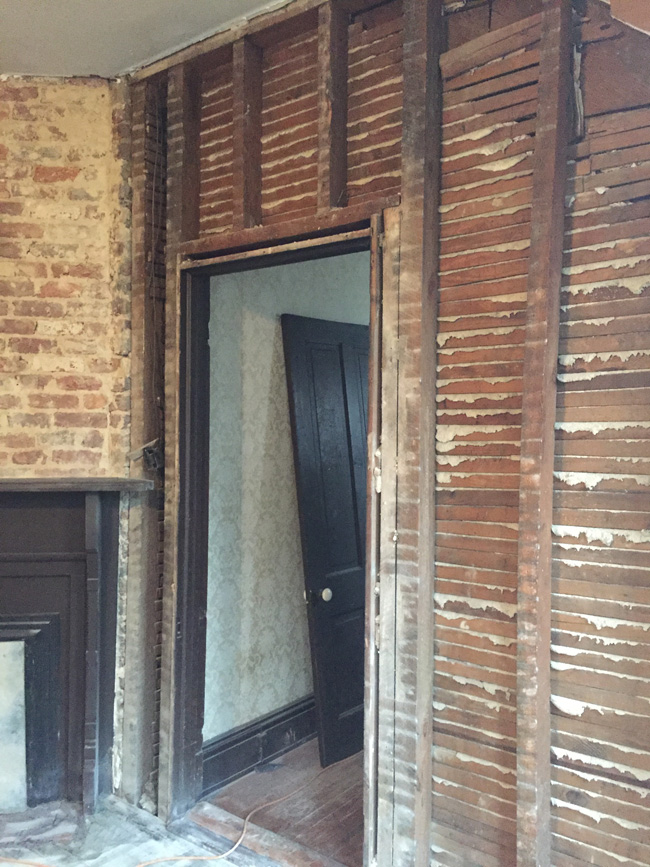
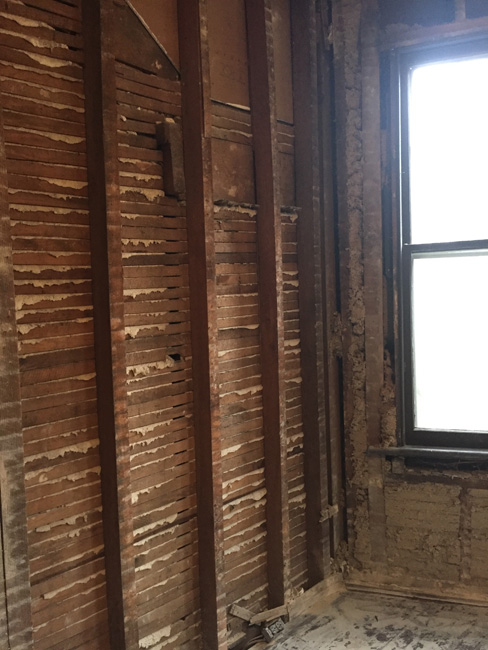
We were very happy to see the blown in insulation on the outer walls!
Next week, I’ll share some of the pantry, as that is part of my participation in One Room Challenge™, along with some more progress!
The next steps in this room is getting the plumbing roughed in, the electrical roughed in and the HVAC linesets run through the walls while they are opened up.
Don’t forget to check out what the selected designers and other guests are up to in the One Room Challenge™

——
Did you miss other posts in this series? Check them out here.
Week 1 – Adding a Kitchen – The Before
Week 2 – Kitchen Layouts and Plaster Dust – You Just Read It
Week 3 – Electrical, Plumbing and HVAC
Week 4 – Walls, Floors and Trim
Week 5 – Cabinets, Counters and Lights
Week 6 – The Finale – Light Filled Folk Victorian Kitchen

Talk about a house with character! So exciting. The kitchen layout is definitely a challenge. I look forward to seeing what you came up with.
Wow, extra points for living in your reno LOL. It’s going to be a beautiful kitchen, especially with the exposed brick…what a pleasant surprise! Can’t wait to see the details unfold 🙂
You. Are. Crazy. I can’t believe you’re tackling this for the ORC!! But yes, keeping the old windows is so important. And the brick! And the amount of light! OMG I can’t wait to see it all.
That brick though!! What a wonderful surprise! There is no doubt it will turn out great!
Looking forward to see how you work out all these details!
Wow wow wow! Thanks so much for sharing the progress. It must be slightly crazy living in the reno home but I absolutely love the concept and can’t wait to see the final result.
I love laying out with blue tape too. It really helps. Looking forward to following along. 🙂
Plaster dust means progress! Right! I just lived through renovations myself. I’ll send wine. Haha. Can’t wait to see how this turns out
Oooh, fun rendition view. If only the real thing could be done as quickly. Major props to you four for making it work to live in your reno.