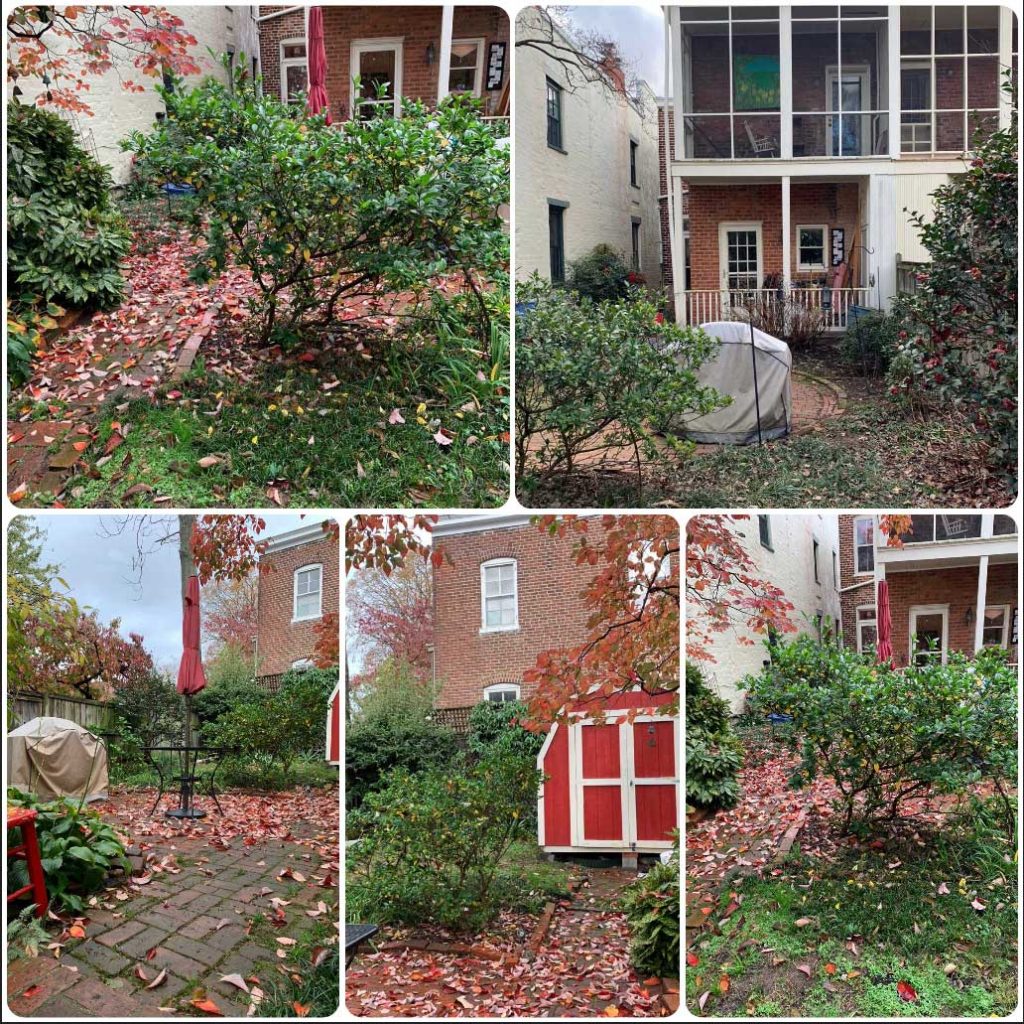
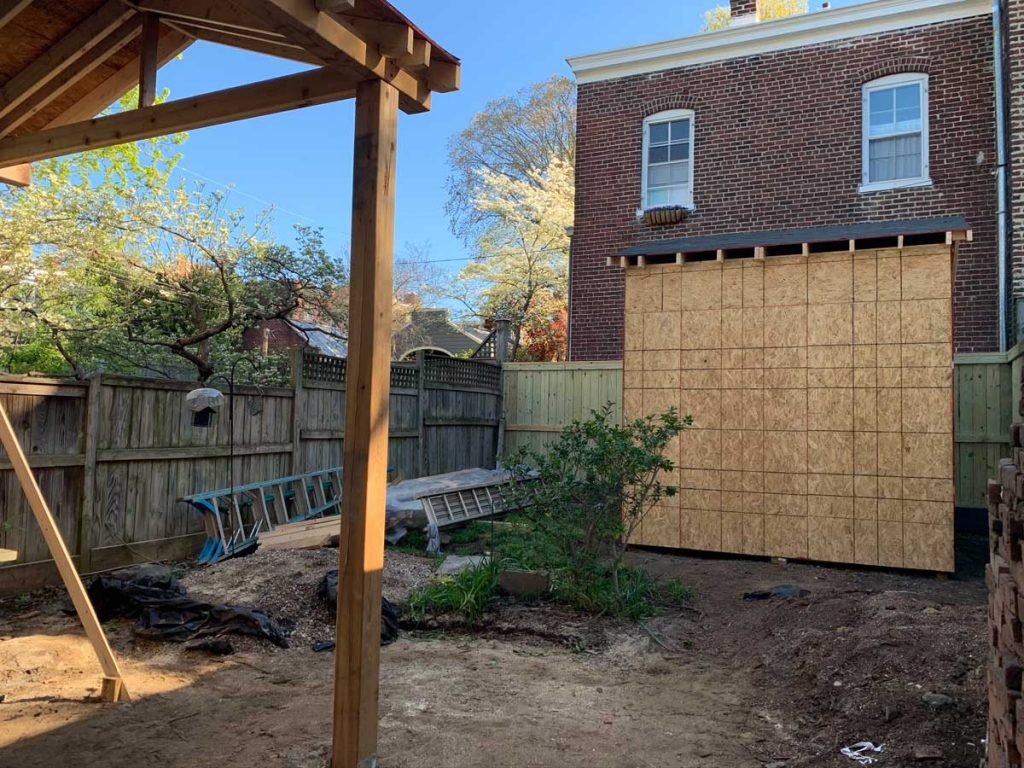
Here is the Before!

This is a typical Church Hill, Richmond,VA, Back Yard. Twenty Eight feet wide by 150 feet long, which includes the footprint of the home!!
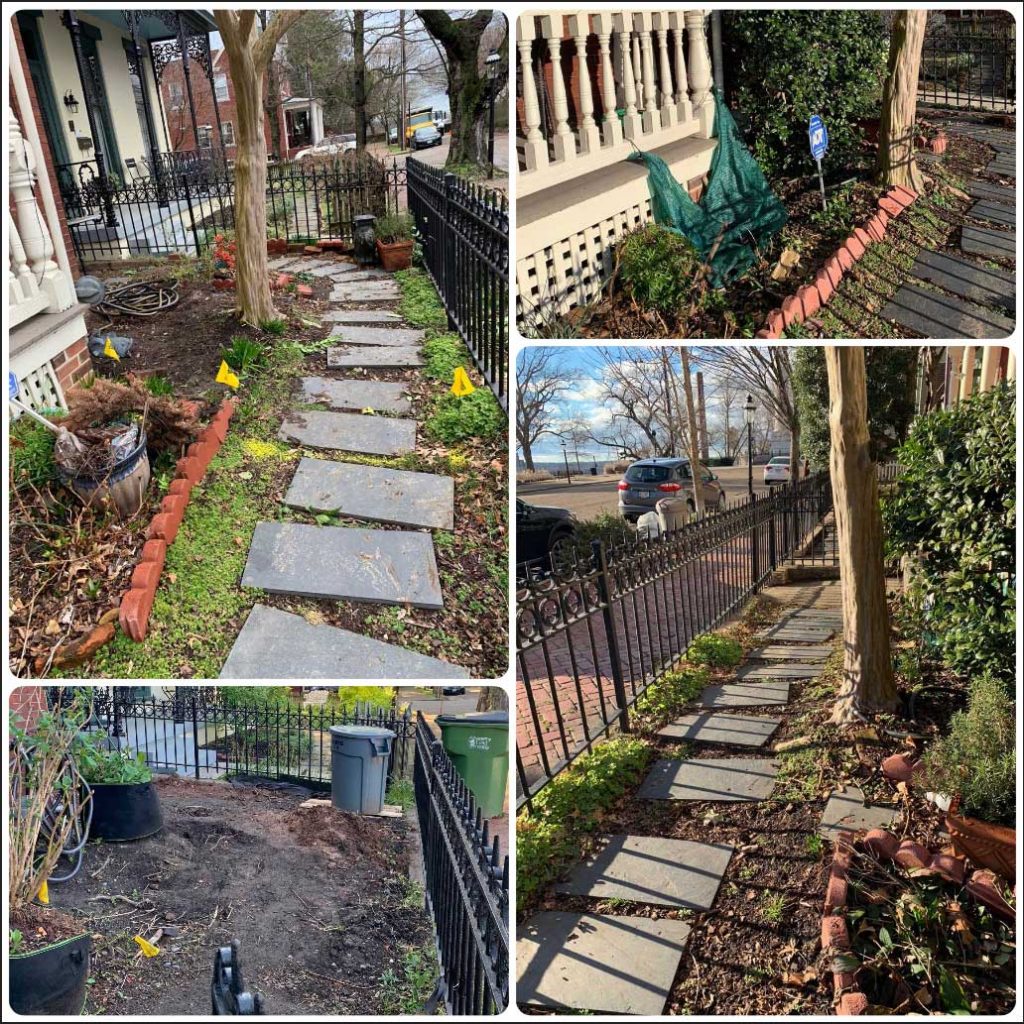
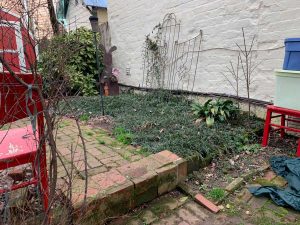 Right after you walk out the back door, you couldn’t walk directly out the back door, you had to walk down two awkward steps then navigate over this awkward step that you had to step up and over EACH way. (image on left)
If you live in a Church Hill Property, you already know that if you don’t have attic or crawlspace storage (as is pretty common in these historic properties) then you have to get quite creative with ways to store your out of season or sports type
gear. The small shed was no longer cutting it.
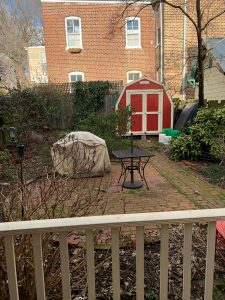
The plants were quite overgrown for the space and there was no place to sit and enjoy the outdoors while also being sheltered from the elements.
The side pathway along the home was a soft pea gravel and it was difficult to get the garbage and recycling to the curb.
I know, I know, I know — you, like me, we work with what we have — BUT — All spaces can be improved to better suit your life!
I don’t believe in cookie cutter design. Each and every single space I come across carries its own needs and wants that is based on the character of the neighbourhood and most importantly the needs and wants of the people who inhabit the space
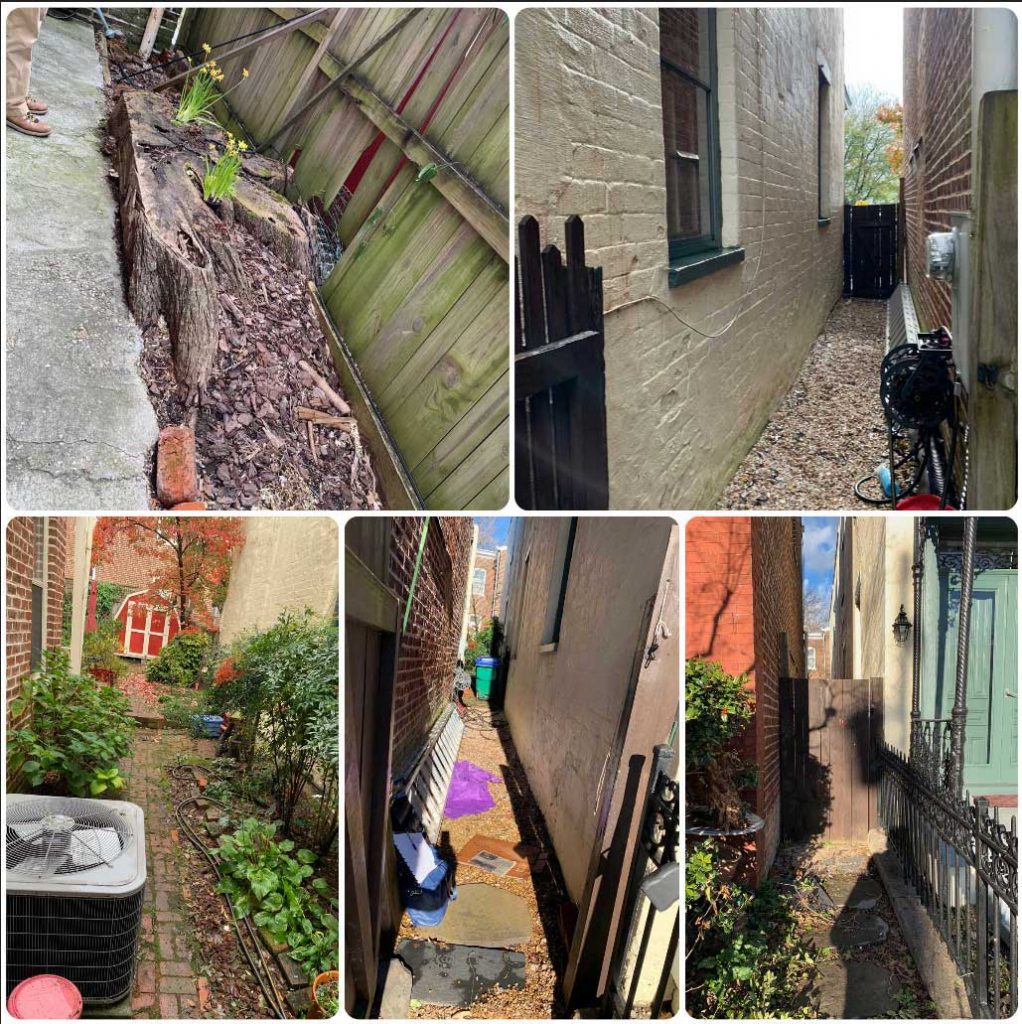
And here is the front of the property:
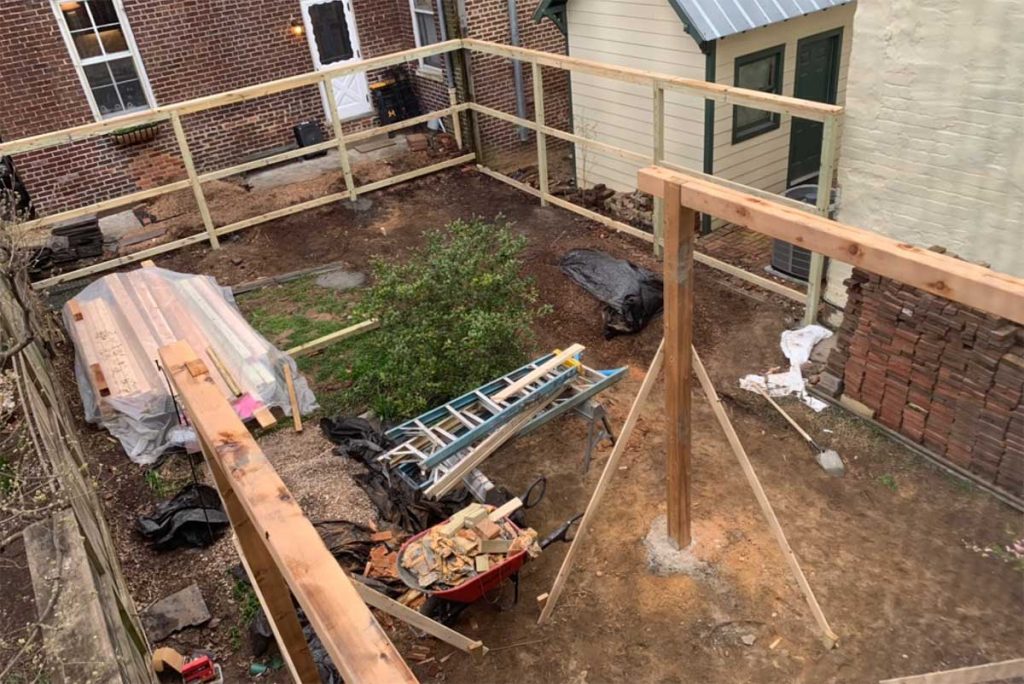
We started the project with some stump grinding, as TWO neighbours had very large trees removed in the previous year.
Next up, came the new fence installation, along with some grading where we found MASSIVE roots from the two neighbours trees!
As you can see from the images, these were plentiful, and in most cases they were also larger than the diameter of my thigh! So massive — uh, not my thigh, but the roots 😉 !!

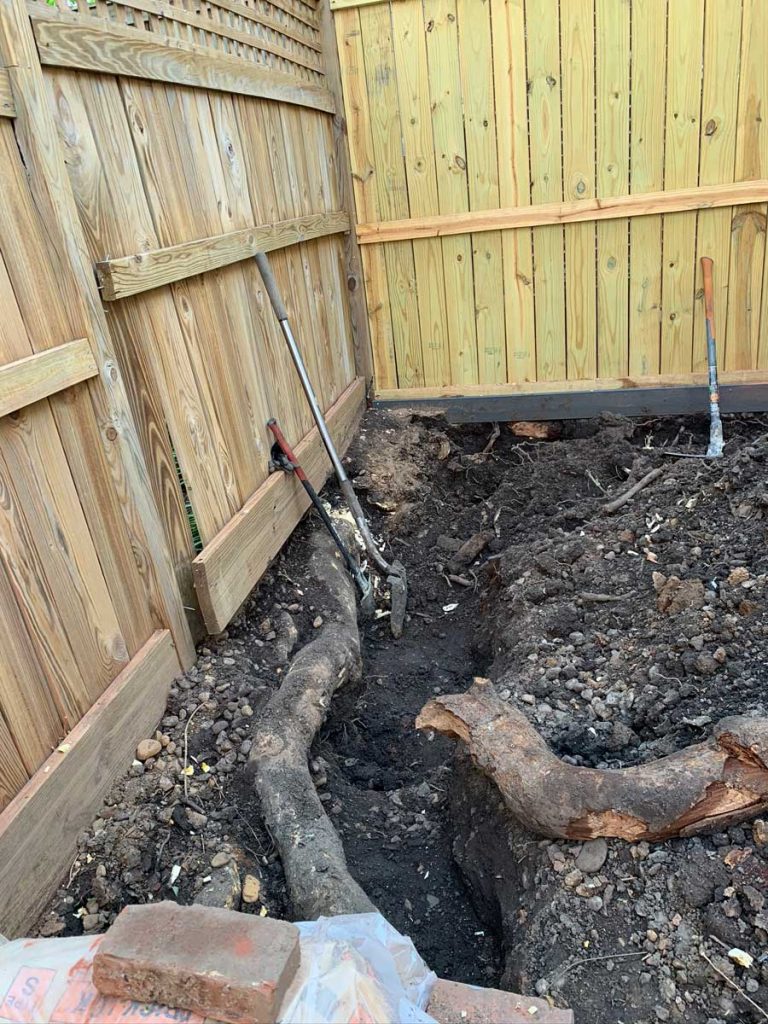
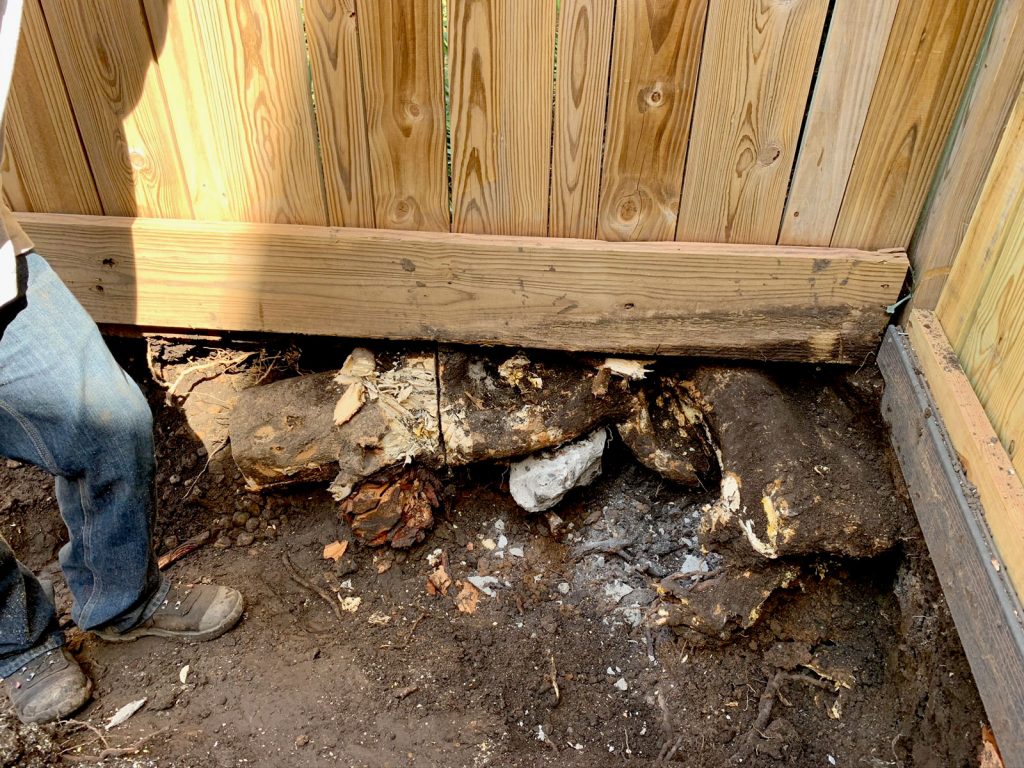
This is a great time to mention that when you work on properties with limited access, meaning you can’t get machinery in the back yard, you need to rely on hardworking and creative contractors who can navigate the 27″ access points and who have the skills to think outside the box.
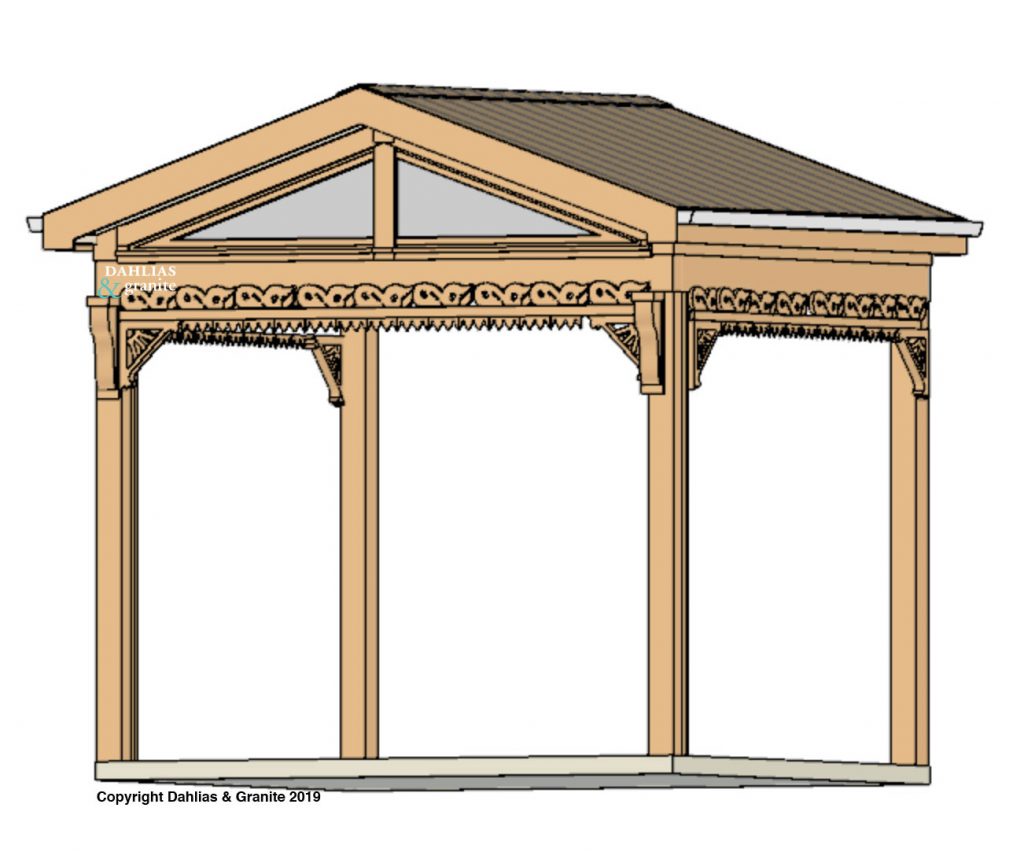
The design intent was to give the homeowners a space where they could relax under the shelter of a roof, with the option to enclose the space with mosquito netting. As Church Hill is a city neighbourhood, privacy is also a consideration in the design.
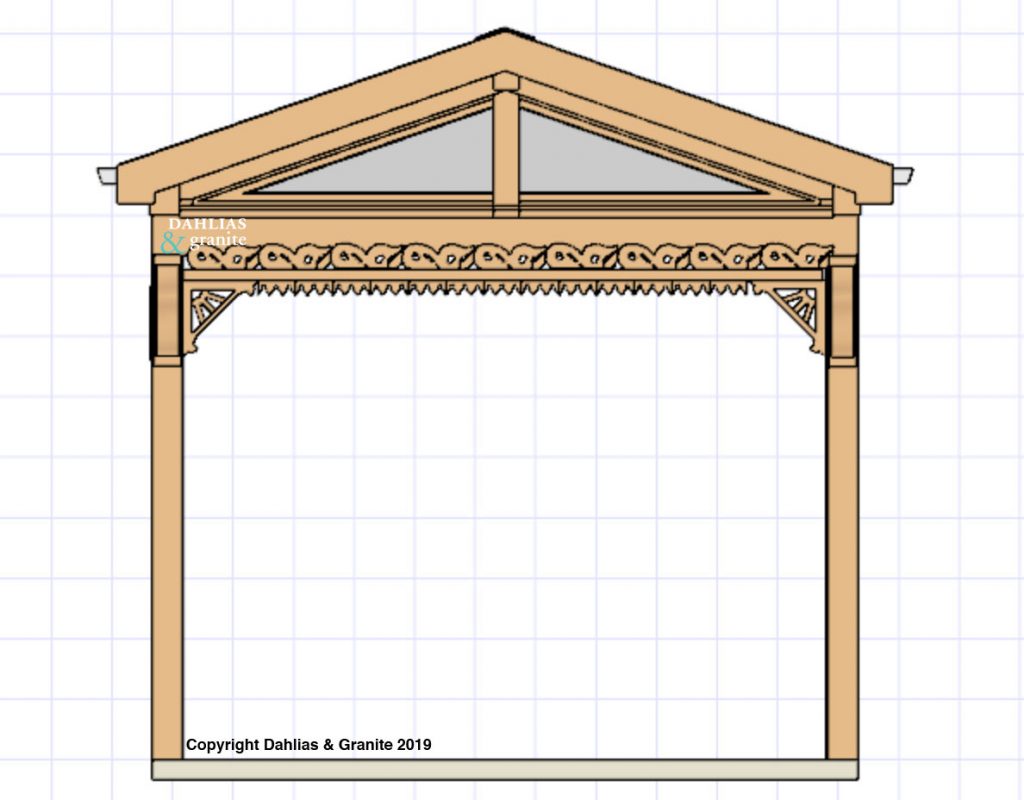
The clients 1889 Victorian has this STUNNING millwork on the front porch, and as a nod to the properties historic roots I brought a little of the history into the design of the pergola.
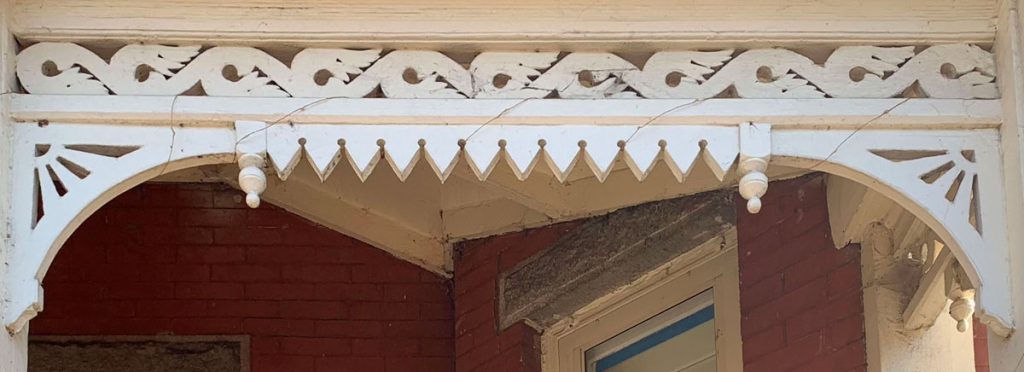
(Aside; if anyone knows of the original designer of the 1889 scrollwork, I’d love to know!)
We simplified the scrollwork a little, and the carpenter hand-cut (with tools) all of the pieces on the pergola!
Ok, back to the fence! The fence framing was completed concurrently with the pergola.

Next the custom sized shed got built while the roofed pergola received some interior details. This shed has 9′ walls allowing the clients to have ample storage in this postage stamp yard. I faced the door towards the side fence so that the beautiful cedar sides could be seen and admired from the home and rest of the outdoor space.
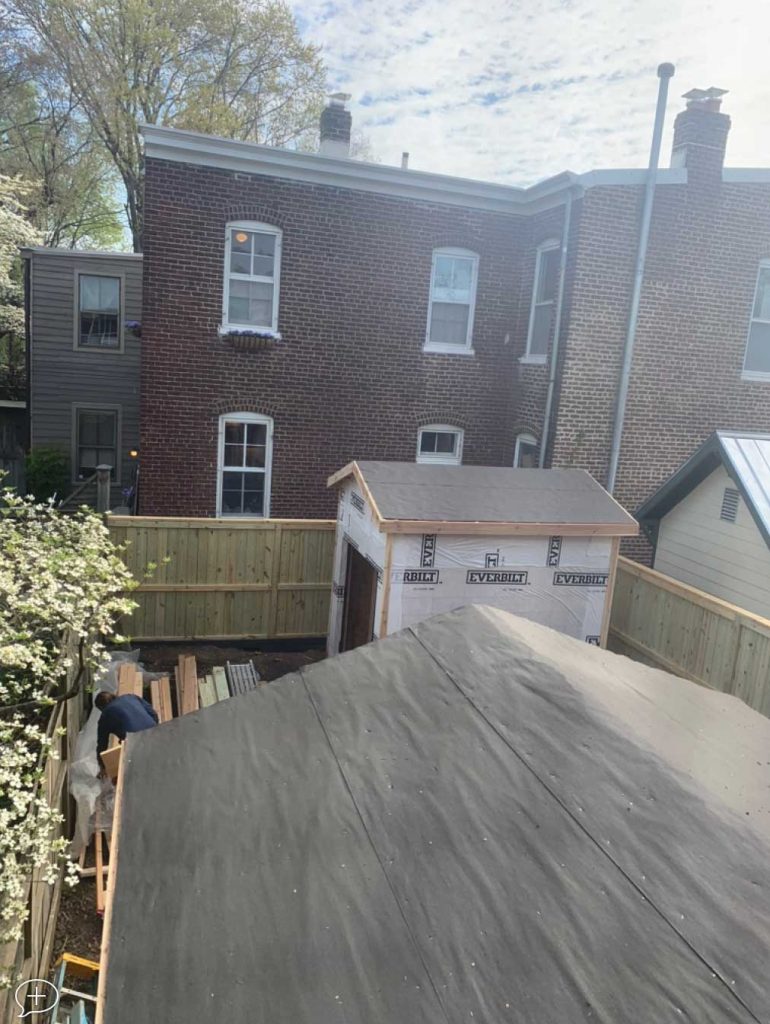
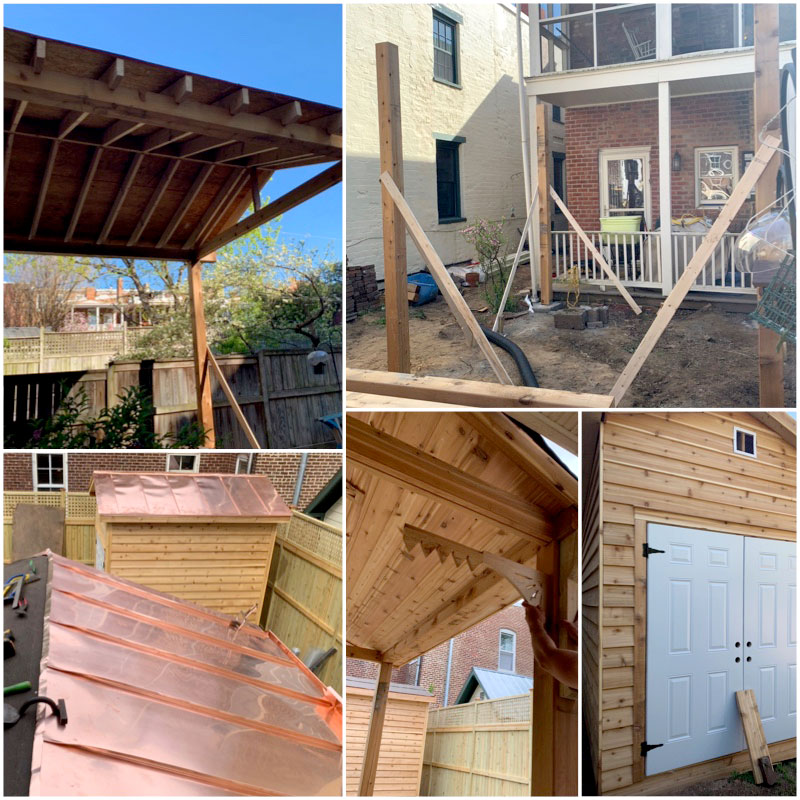
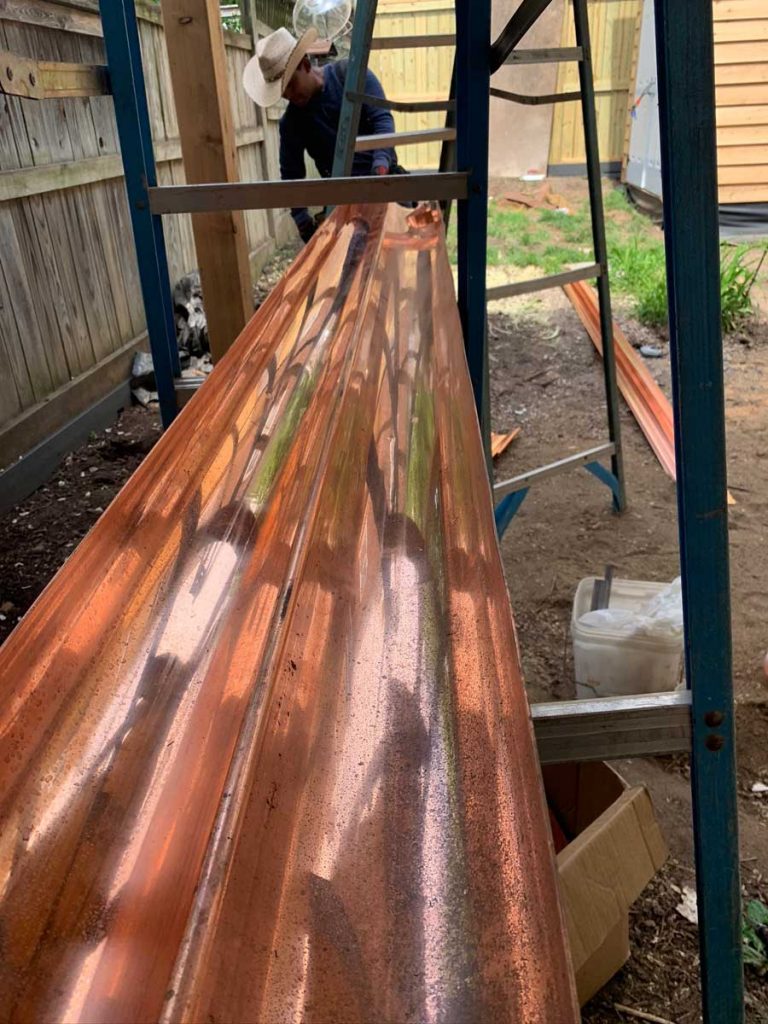
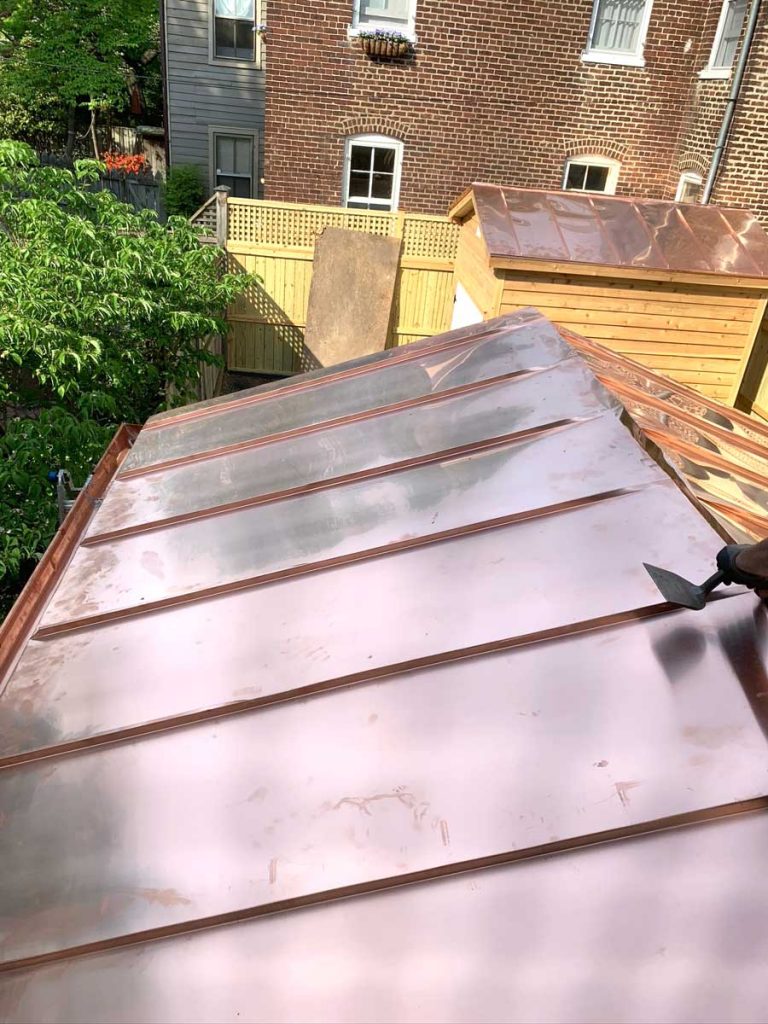
The homeowner decided on a copper standing seam room for both structures! They have a second story porch where they can enjoy the changing beauty of the copper!
All of the copper was formed and cut to size on site.

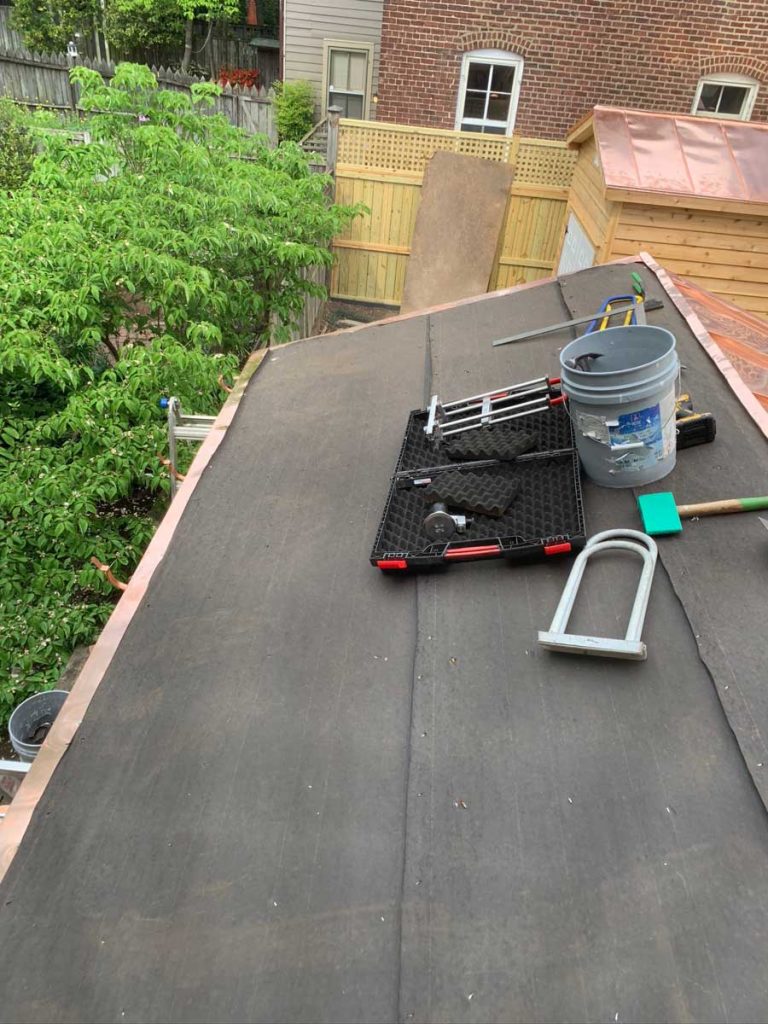
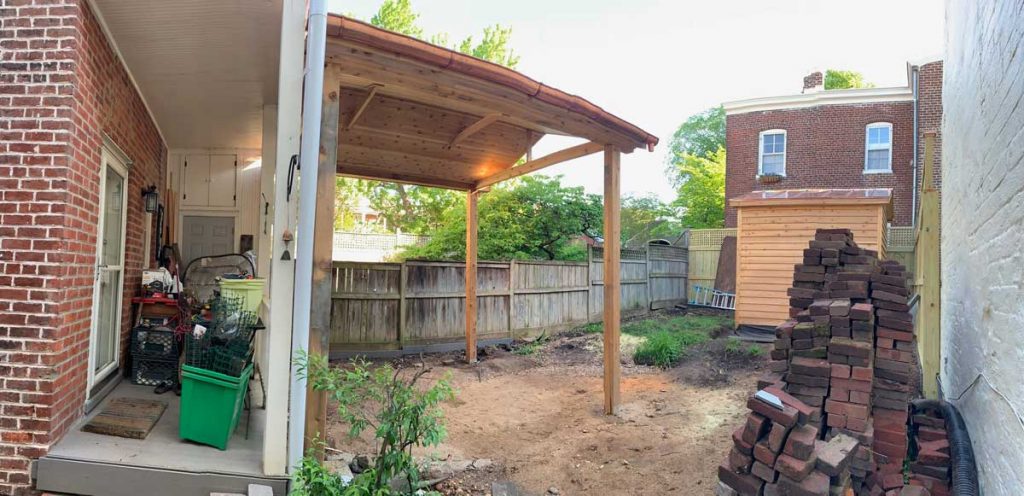
With the main portion of the two structures complete, we moved on to the next portion — prepping for the hardscape!
The large stack of bricks are stored here to use on the front walkway!
The homeowners had been having some drainage issues, so I definitely wanted to make sure that this got taken care of before the hardscapers arrived to build the walkways, patio, ramp and walls!
Here you can see why the drainage wasn’t working!
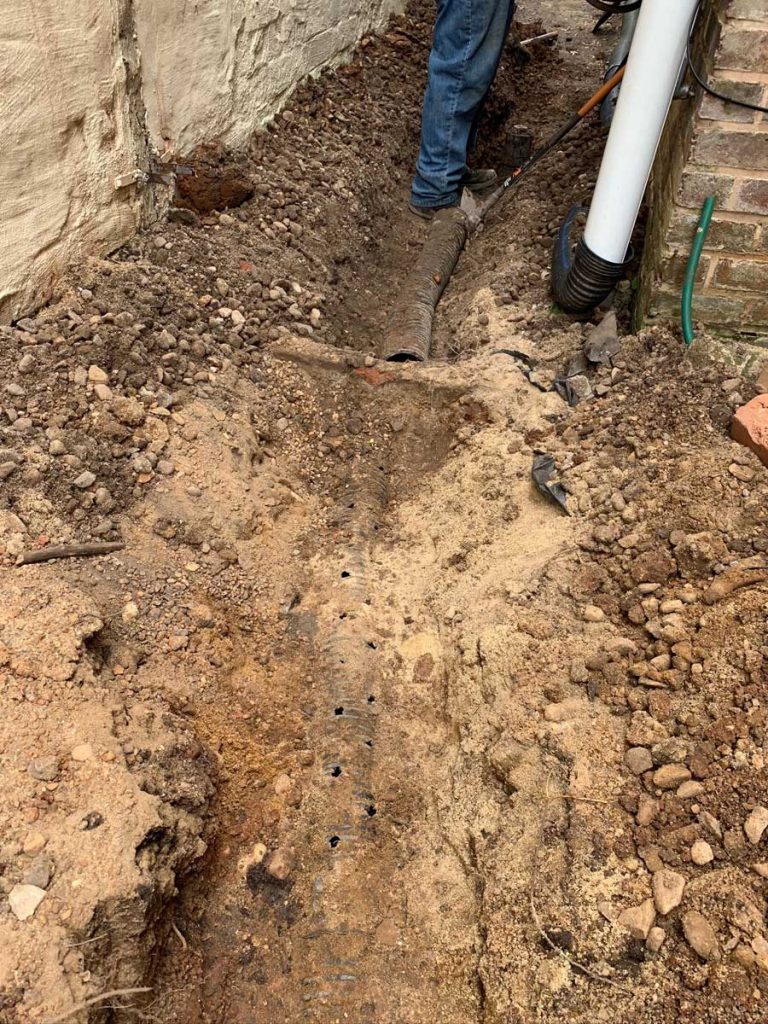
If you are doing your own drainage, please DO NOT use this floppy, flexible drain line! They get crushed, they get clogged and they fail 100% of the time, most of the time within 10 years!
This particular drainline didn’t have a properly created french drain around it. A french drain should ALWAYS have gravel surrounding the drainline, then also have fabric around the entire drain so that it doesn’t get clogged with dirt and sediment!
What you can’t see from the photo, is halfway through the drain, instead of being on a gentle slope to the exit, the drain sloped down, then UP, then down again! No wonder the drainage wasn’t working!!
We took care of the drainage and got ready for the next transformative stage!
Stay Tuned for PART TWO!
I’ll share what design we went with for the patio, walkways and plantings!!
In the meantime, I’d love to hear from you, tell me below in the comments what portion has surprised or delighted you so far!
This is a wonderful pictorial and descriptive record of the project. What a challenge. Everything seeming to be higgledy piggledy. Love the copper and replica fret work. Excited to see more.
Thank you for your comment. I like my blogs to tell a story. The copper is one of my favourite elements as well.
This is a nice project and very descriptive with details. Also, the colorful photos that goes along with your story.
Thank you for the compliment. As a designer I feel it is very important to show my work as well as write about it.
This is looking great! I especially love the copper!
What a big project to take on! You guys are doing so great. I love that you’re sharing every step of the way with us 🙂
I am glad you are enjoying at Sara. Be sure to check out Part 2. I truly love taking people along the design journey with me.
What an amazing post. A great project with lots of challenges. Drain lines are a complicated part of any renovation.
Aaaahhhh….alright! I await part 2 of the works! I loved the fact that you managed to fix the drainage channel.
Thank you for your comment. Be sure to check out the webiste (www.dahliasandgranite.com) for part two.
I am loving the transformation already! I love when people restore old buildings and keep the character!
Bringing historic homes and places back to life is my passion. I love being in the heart of RVA and doing my part to moderize without taking away the historic charm. Thank you for your comment.
This is awesome! I love seeing design/build progress photos. Looking good!
Thank you for the kind words, Matt. Be sure you check out part two. The final project is stunning, if I do say so myself.
love all the photos you have posted! it is amazing how small these yards are in Richmond.
Joy at The Joyous Living
Thank you Joy. Yes, some are incredible small. Most of the houses in historic districts do not have much space for an outdoor oasis, so you have to get creative.
Wow! I hope to see the progress on the next post. This is very interesting! Great tips on the drainage!
Thank you for the comment. Yes, please be sure to check out the website (www.dahliasandgranite.com) for part 2!
This is such an interesting project!! Would love to see the outcome! So exciting! Thanks for the tips, too!
You are very welcome Toni. I love to share my experiences of my design journey. I feel like there is always something to learn.
Its a really cool project. Thanks for documenting it and looking forward to updated progress.
Thank you! I love documenting the projects, it is always very fun to go back and see what all we have accomplished. Be sure to check out part two.
Great project, well done for taking it on. Can’t wait to see the updates
Thank you for the comment Emily. It was quite the undertaking, but I am so proud with how it turned out.
What an amazing transformation. Great project and so much of creativity involved. Wonderful is how I would love to put it. All the best for your future projects too.
Thank you for your kind words. It was really a great project.
I can’t wait to see the finished project. I know it is going to turn out spectacular. I will keep checking back to see how things are going.
Thank you! Yes, please be sure you check-in on Part 2. The final product is amazing, if I do say so myself.
I love learning about other places. Love the pictures you shared. 🙂
Thank you Shannon. I love sharing my places with others.
Such a great look at the design intent and how it relates to the home’s architecture and the complications that can come with a landscape project!
Thank you Lisa for noticing the finer details. It was our intent to speak to the home and the historic nature of it all.
Love this whole project – from the higgledy piggledy to the explanations and the progress pix. What a charming community! Love seeing a small yard realize its potential!
Looking forward to the finish photos!
Jeri, thank you for your kind words. It had its challenges but it sure was fun.
Wow, Lora! This is going to be incredible! Can’t wait to see the final result…and I HEART that copper roofing!
Thank you Janet. I heart the copper roofing as well, I am so glad the client decided to go with it. It really sets it apart from everything else. We added copper rainchains as well, be sure to spot them in the final photos.
Beautiful mill work and love the way your are bringing that into the design of the Pergola:)
Yes! Thank you for noticing Mary Ann. The millwork was one of my favourite parts. It was very imporant to me for it to look authentic and compliment the front of the home.
In my 20’s I lived in a townhouse with a backyard about the size of this. I always wanted to do more with the space, but I was in my 20’s so I didn’t have a lot of money to spend and it just never made my priority list.
I will say, I miss having a small backyard. It is so much easier to maintain!
This is going to be incredible and I cannot wait to see the finish! The copper roof material is gorgeous!!
How fun! It can be a blessing to have a small space. This was very fun to do and I am very proud of the final design.
Oh wow, those tree trunks are massive! Thank you for taking us on a journey of this project. The copper roof(s) are stunning!
Thank you for your kind words Sheri. The roofs are one of my favourites as well. I was surprised about the roots when we started demo too!
Hi Lora:
I really enjoyed this pictorial walk through, Part 1, of your project. I especially love that you shared something so practical re: drainage and what a French drain is. I never knew that before and I love learning.
Your clients must be so thrilled with how things are coming along! I am looking forward to seeing Part 2.
Thank you Leslie. I love educating as well, glad you were able to take away a bit of new knowledge. The smaller details are what makes the project great. The clients are very happy with the results, and so am I.
Such a challenging space! Looking forward to seeing the end result!
It was a challenge indeed. Be sure to catch Part 2 for the full reveal. You can also see a video walkthrough on our facebook page Dahlias and Granite.